Registering as an Optom
This guide shows you how to create your Lutra Connect account and set up your practice. It takes less than five minutes.
Last updated About 4 hours ago
Before you start, have these ready:
Your practice's name and address
Your GOC registration number, if you are a registered optometrist
Been invited by a colleague? Use the link in your invitation email instead. You'll join your practice's existing account. See
"Joining an existing practice" at the end of this guide.
Step 1: Create your account
Go to our website and click Get started.
On the sign-in page, click Sign up.
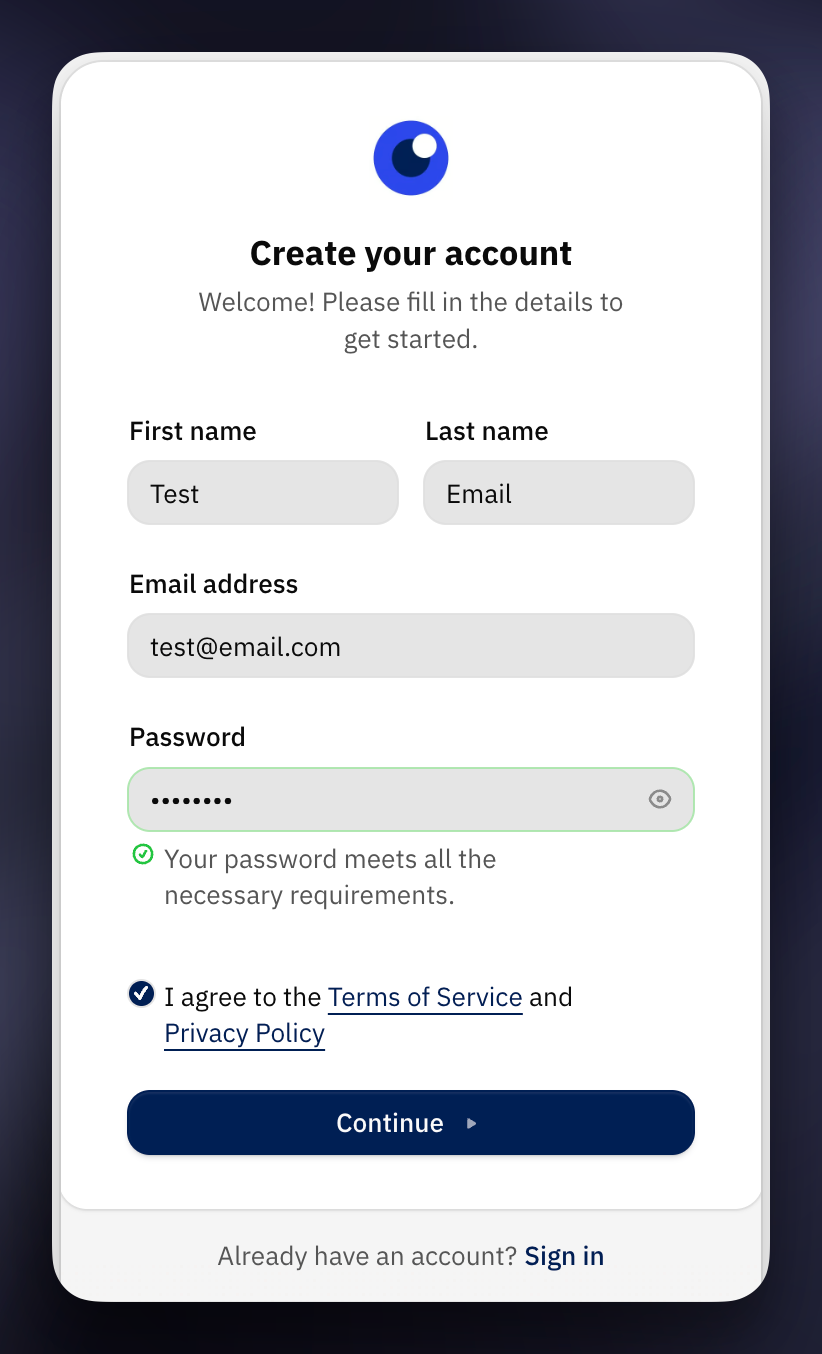
Enter your first name, last name, email address and a password. Your password must be at least 8 characters long.
Click Continue.
Step 2: Verify your email address
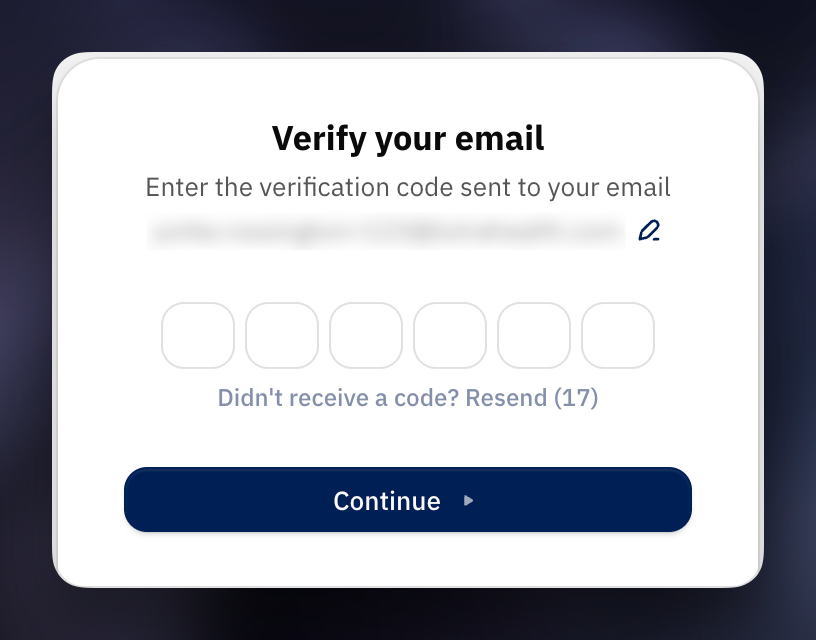
We'll email you a verification code. Enter the code on screen to continue.
If the email hasn't arrived after a few minutes, check your spam or junk folder. You can also click Resend to get a new one.
Step 3: Choose your organisation type
You'll be asked "What type of organisation are you setting up?"
Choose Optometrist. This option is for optometry practices and groups, including independent and locum optometrists.
Your choice decides which features and plans you can use, so please check you've picked the right one before you continue.
Step 4: Add your practice name and address
Enter your practice name in Organisation Name. Use the name patients and other clinicians know you by.
Start typing your address in Primary Practice Address, then choose it from the list.
If your address doesn't appear, click Manual and type it in yourself.
Click Continue.
Other organisations on Lutra Connect may be able to see this address.
If you see "This organisation may already be on Lutra"
This means a practice with a similar name is already registered. If it's your practice, ask a colleague there to invite you. Creating a second account would split your patients and referrals across two accounts that can't see each other.
If it isn't your practice, click Create anyway. You can also click Use a different name to change the name you entered.
Step 5: Accept the agreements
Read the Platform Terms and the Data Processing Agreement.
Tick the box to confirm that you agree to them and that you're allowed to accept them on behalf of your practice.
Click Continue.
Step 6: Add your professional registration
Choose I have a registration.
Choose General Optical Council (GOC).
Enter your GOC registration number.
Click Continue.
If you work in an admin or support role, choose Non-clinical user instead and go to Step 7.
You can add or change your registration later in your profile settings.
Step 7: Complete setup
Click Complete setup. We'll create your account and take you into Lutra Connect.
What happens next: verification
We check every new organisation before clinical features are switched on. While we do this, you'll see a page called "Organisation verification in progress". You'll also see a banner saying your organisation is unverified.
We usually finish verification on the same working day. Outside normal working hours it may take a little longer. We'll email you as soon as it's done. You can also click Check again at any time.
Once you're verified, you can start sending referrals and post-operative assessments straight away on your current plan. Some premium features need a paid plan.
Next steps
Invite your colleagues from Settings → Members.
If you need help, email iris@lutrahealth.com.
Joining an existing practice
If your practice already uses Lutra Connect, ask one of its admins to invite you.
Open the link in your invitation email.
Create your account and verify your email address, as in Steps 1 and 2.
You'll go straight into your practice's account. You don't need to do Steps 3 to 7.
If you sign up without using the link, you'll see "You have pending invitations". Click Accept next to your practice's name.
Was this helpful?
Still need help? Ask the team